We’ve all experienced a device that suddenly stops charging despite being plugged in correctly—often, the culprit lies in dirty or corroded charger connectors. By methodically cleaning and inspecting these terminals, we can prevent performance issues and extend device lifespan. Understanding the signs of wear and knowing the right tools and techniques are essential steps before problems escalate, which is exactly what we’ll explore next.
Key Takeaways
- Power off devices before cleaning charger connectors to ensure safety and prevent damage.
- Use a soft-bristle brush and isopropyl alcohol with a lint-free cloth to remove dirt and corrosion effectively.
- Inspect connectors for signs of dirt, corrosion, deformation, or broken pins to assess functionality.
- Test connector continuity with a multimeter and verify charger voltage to troubleshoot charging issues.
- Apply dielectric grease after cleaning to prevent future corrosion and maintain optimal electrical conductivity.
Why Charger Connectors and Terminals Need Regular Cleaning
Although charger connectors and terminals are designed for durability, they accumulate dirt, oxidation, and debris over time, which can impede electrical conductivity and lead to inefficient charging or device damage. We need to prioritize connector maintenance to guarantee ideal contact surfaces. Contaminants increase resistance at the interface, reducing charging efficiency and potentially causing overheating. Regular cleaning removes these impediments, restoring proper electrical pathways. Neglecting this maintenance risks signal degradation and intermittent power delivery, which can shorten device lifespan. By methodically inspecting and cleaning connectors, we maintain consistent electrical performance and prevent failure. This proactive approach safeguards both the charger and the device, assuring reliable operation. In conclusion, routine connector maintenance directly supports charging efficiency and device longevity, making it an essential practice for any user.
How to Identify Dirt, Dust, and Corrosion on Connectors
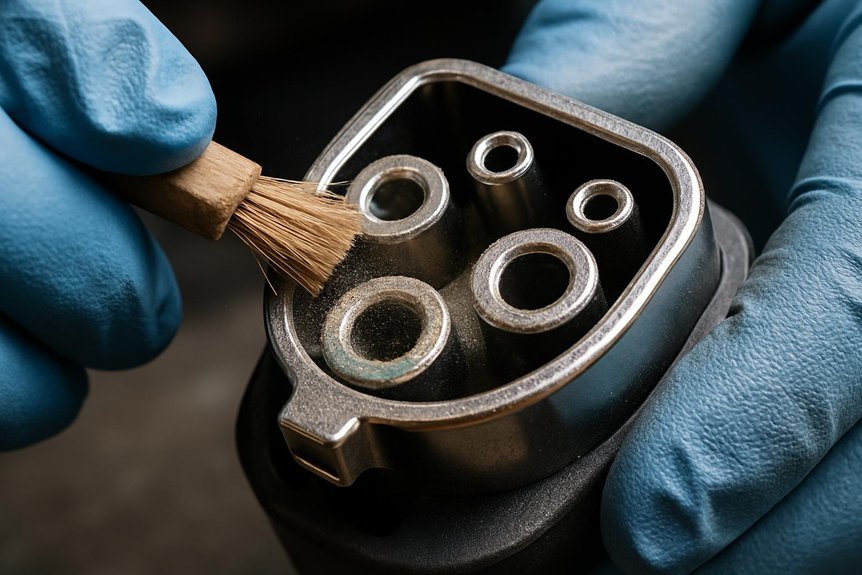
Let’s start by identifying visible signs of contamination such as dust accumulation, dirt deposits, and corrosion buildup on charger connectors. We need to recognize common corrosion indicators like green or white powdery residues and metal discoloration. Additionally, it’s important to distinguish between surface dirt and actual physical damage to guarantee accurate assessment.
Visual Signs Of Contamination
Contamination on charger connectors often manifests through distinct visual indicators that we can detect with careful inspection. Recognizing these signs requires understanding typical contamination sources and applying systematic inspection techniques. We focus on identifying dirt, dust accumulation, and subtle discolorations that suggest contamination.
| Contamination Type | Visual Indicator | Inspection Technique |
|---|---|---|
| Dirt | Dark smudges or streaks | Use magnification and light |
| Dust | Fine powdery deposits | Wipe gently with a lint-free cloth |
| Corrosion (early) | Slight discoloration, dullness | Compare against a clean connector |
| Residue | Sticky or oily film | Test surface texture with fingertip |
Common Corrosion Indicators
Understanding how dirt, dust, and corrosion present themselves on charger connectors helps us maintain their reliability and performance. Corrosion types commonly encountered include white powdery deposits from aluminum oxidation, green or bluish-green verdigris indicating copper corrosion, and brown or reddish rust signaling iron-based metal degradation. Dirt and dust often appear as fine particulate layers that obscure connector surfaces but do not cause chemical changes. Recognizing these indicators early is crucial to determine appropriate cleaning methods and adjust maintenance frequency accordingly. Frequent inspections allow us to identify corrosion before it compromises electrical contact integrity. By systematically evaluating connectors for these signs, we guarantee peak function and prolong service life, reducing downtime and repair costs. Accurate identification guides us in selecting targeted cleaning procedures tailored to specific corrosion types.
Differentiating Dirt From Damage
Although dirt, dust, and corrosion can all impair charger connectors, we must distinguish between superficial contaminants and structural damage to apply the correct cleaning approach. Identifying dirt types such as dust accumulation, grease, or corrosion deposits allows us to select appropriate cleaning agents. Conversely, recognizing damage signs like pitting, cracks, or bent terminals is vital to prevent further harm.
Key indicators to differentiate dirt from damage include:
- Dust appears as loose, dry particles easily removed by brushing.
- Grease or oil feels sticky and may require solvent cleaning.
- Corrosion manifests as powdery or crusty deposits.
- Damage signs include visible metal deformation or discoloration.
- Cracks or breaks compromise connector integrity and need replacement.
Tools and Materials for Safe Cleaning of Charger Terminals
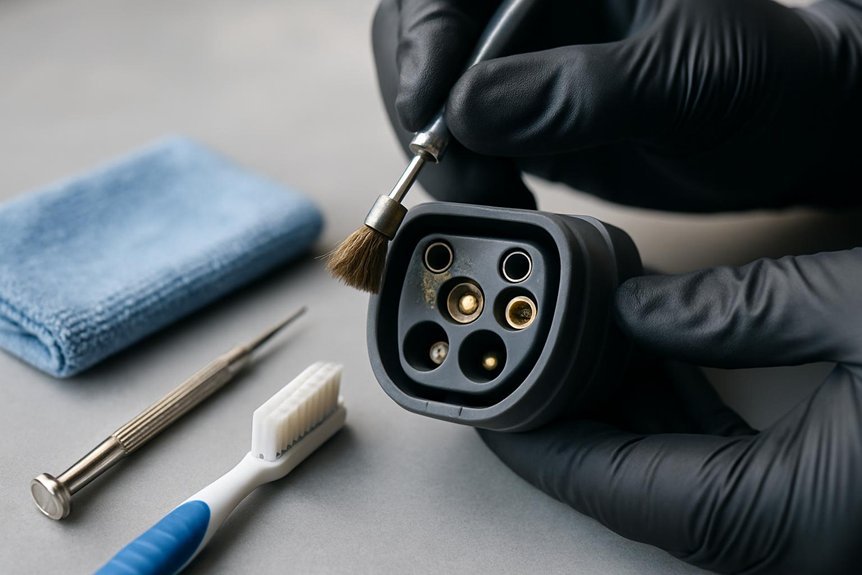
To clean charger terminals effectively and safely, we need a specific set of tools and materials designed to remove dirt and corrosion without damaging delicate connectors. Essential items include soft-bristle brushes and lint-free cloths to avoid abrasion. We use specialized cleaning solutions—typically isopropyl alcohol or contact cleaner—to dissolve contaminants without leaving residues. Additionally, small picks or plastic scrapers help dislodge stubborn debris carefully. After cleaning, applying protective coatings like dielectric grease prevents future corrosion and guarantees reliable electrical contact. Gloves and eye protection are necessary to handle chemicals safely. Together, these tools and materials enable us to maintain charger terminals’ integrity systematically, minimizing the risk of damage while maximizing cleaning effectiveness. This precise approach forms the foundation for proper maintenance and longevity of charger connectors.
Step-by-Step Guide to Cleaning Charger Connectors Properly
Let’s gather the necessary tools, including isopropyl alcohol, cotton swabs, and a soft brush, before starting the cleaning process. We’ll begin by disconnecting the charger and ensuring it’s powered off to avoid any risk. Then, we’ll methodically clean the connectors using gentle, controlled motions to remove dirt and corrosion effectively.
Tools Needed
Three essential tools help us clean charger connectors effectively and safely. To apply proper cleaning techniques and follow maintenance tips, we must gather the right equipment before starting. These tools enable precise removal of dirt, oxidation, and debris without damaging sensitive components.
Here’s what we need:
- Isopropyl alcohol (90% or higher) for effective residue removal
- Soft-bristle brushes to gently clean connector surfaces
- Lint-free microfiber cloths for wiping and drying
- Compressed air canister to blow out dust from tight spaces
- Plastic or nylon picks to carefully dislodge stubborn grime
Using these tools methodically guarantees thorough cleaning and proper upkeep of charger connectors, extending their lifespan and maintaining peak electrical contact.
Cleaning Procedure
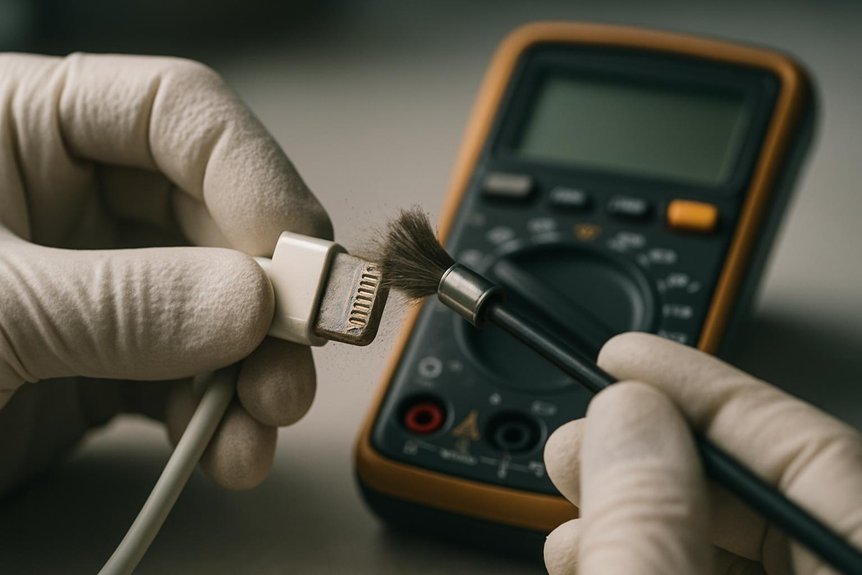
We begin by powering off and unplugging the device to guarantee safety throughout the cleaning process. Next, we inspect the charger connectors for visible dirt, corrosion, or debris. Using a soft-bristle brush, we gently remove loose particles. For stubborn grime, we apply isopropyl alcohol with a lint-free cloth, making sure of thorough but careful cleaning to avoid damaging sensitive components. We allow the connectors to dry completely before proceeding. Regular connector maintenance includes establishing a cleaning frequency based on usage and environmental exposure, typically every three to six months. Finally, we re-inspect the connectors for any signs of wear or corrosion that may require professional attention. Following this methodical procedure guarantees peak conductivity and prolongs the lifespan of the charger connectors.
How to Inspect Connectors for Damage or Wear
Before cleaning charger connectors, we need to thoroughly inspect them for any signs of damage or wear that could affect performance or safety. This step is essential to guarantee connector longevity and prevent malfunction. We systematically check for key wear indicators that signal the need for repair or replacement. Our inspection includes:
- Examining connector pins for corrosion or bending
- Checking insulation for cracks or brittleness
- Identifying discoloration or burn marks indicating overheating
- Evaluating the integrity of locking mechanisms and seals
- Verifying secure and tight terminal contacts
Preventing Future Build-Up With Protective Tips
Maintaining charger connectors free from build-up requires consistent application of preventive measures that protect against dirt, moisture, and corrosion. We recommend establishing a routine preventive maintenance schedule that includes cleaning connectors and terminals regularly, even when no visible debris is present. Utilizing protective covers when the charger is not in use creates a physical barrier against environmental contaminants, greatly reducing accumulation. Additionally, storing connectors in dry, dust-free environments minimizes exposure to corrosive agents. We should also inspect protective covers periodically for wear or damage, replacing them promptly to guarantee continued effectiveness. By integrating these precise protective tips into our maintenance protocol, we extend the lifespan of charger connectors and assure peak performance while minimizing the risk of future build-up.
Troubleshooting Charging Issues Related to Dirty Connectors
Even with preventive measures in place, charger connectors can still accumulate dirt and debris that interfere with proper charging. When troubleshooting charging issues related to dirty connectors, we must apply precise connector maintenance tips and troubleshooting techniques. Start by visually inspecting connectors for contamination or corrosion. Then, use a soft brush or compressed air to remove debris. If charging remains inconsistent, test the connector’s continuity with a multimeter. We should also verify the charger’s output voltage to rule out other faults. Finally, make sure connectors fit snugly without excessive force, indicating no deformation.
- Inspect connectors under good lighting.
- Clean with isopropyl alcohol and lint-free cloth.
- Use a multimeter for electrical continuity.
- Confirm charger voltage output.
- Check connector seating and alignment.
These steps systematically isolate dirt-related charging issues.
When to Replace Charger Connectors and Terminals
Although regular cleaning can resolve many connector issues, there are times when replacement becomes necessary to guarantee reliable charging performance. We must monitor the connector lifespan closely, as repeated use and environmental factors degrade material integrity. Replacement signs include visible corrosion, cracked insulation, bent or broken pins, and persistent connectivity problems despite thorough cleaning. Additionally, if the terminal exhibits excessive wear or deformation, it compromises secure contact, increasing resistance and heat buildup. Ignoring these signs risks intermittent charging or complete failure. By methodically inspecting for these indicators during maintenance, we can determine the best time to replace connectors and terminals, ensuring consistent power transfer and preventing damage to connected devices. Timely replacement preserves system reliability and avoids costly downtime.
Best Practices to Prolong the Life of Your Charger Components
Because charger components endure constant physical and electrical stress, we need to adopt specific practices that extend their operational lifespan. Proper connector maintenance and terminal longevity rely on consistent, methodical care. Here are best practices to prolong charger components’ life:
- Regularly clean connectors using appropriate solvents to prevent corrosion.
- Inspect terminals for wear, deformation, or discoloration.
- Apply dielectric grease to terminals to reduce oxidation and improve conductivity.
- Avoid excessive bending or tension on cables to prevent mechanical damage.
- Store chargers in dry, dust-free environments to minimize environmental degradation.
Frequently Asked Questions
Can I Use Household Cleaners on Charger Connectors?
We don’t recommend using household cleaners on charger connectors due to their limited household cleaner effectiveness and potential to damage components. Instead, we focus on specialized products to guarantee connector corrosion prevention and maintain peak performance.
How Often Should I Clean Charger Connectors in Humid Climates?
We should perform charger maintenance every 1-2 weeks in humid climates, as humidity effects accelerate corrosion and grime buildup. Regular cleaning guarantees ideal connectivity, prevents damage, and extends the charger’s lifespan effectively and safely.
Are There Specific Chargers That Require Special Cleaning Methods?
Absolutely, some chargers demand special cleaning methods due to sensitive materials prone to connector corrosion. We’ll adjust cleaning frequency and use precise, non-abrasive tools to prevent damage, ensuring peak performance and longevity every time.
Can Cleaning Damage Waterproof or Sealed Connectors?
Yes, cleaning can compromise connector integrity if we use harsh cleaning materials or excessive force. We must choose gentle, compatible materials and follow precise methods to preserve sealing and waterproof features, ensuring reliable performance.
What Safety Precautions Should I Take When Cleaning Connectors?
Like gardeners tending fragile blooms, we must handle connectors carefully. We’ll wear gloves, use proper cleaning tools, avoid moisture intrusion, and inspect for connector corrosion diligently to guarantee safety and preserve functionality without causing damage.
Conclusion
By consistently cleaning and carefully checking charger connectors, we can confidently curb corrosion and clear contaminants. This consistent care creates connections that conduct power precisely and protect performance. Let’s maintain meticulous methods, mastering maintenance to minimize malfunctions and maximize device durability. With regular routines and responsible repairs, we reinforce reliable charging, reducing risks and extending the life of our technology. Together, we guarantee seamless service through simple, systematic steps.